Learning how to set up an extension ladder can be tricky, especially for those using one for the first time. Whether you’re a professional or a DIY enthusiast, understanding the basics of ladder safety is essential.
This article will provide easy-to-follow steps on properly setting up an extension ladder to ensure safety and stability while working at height.
With these tips, you’ll be well-equipped to tackle your next project confidently.

Quick Recommendations
How to set up an extension ladder? (An Easy Guide)
Nervous about using an extension ladder? Fret not! Here’s a precise, step-by-step guide on how to set up an extension ladder to help you set up an extension ladder confidently and safely.
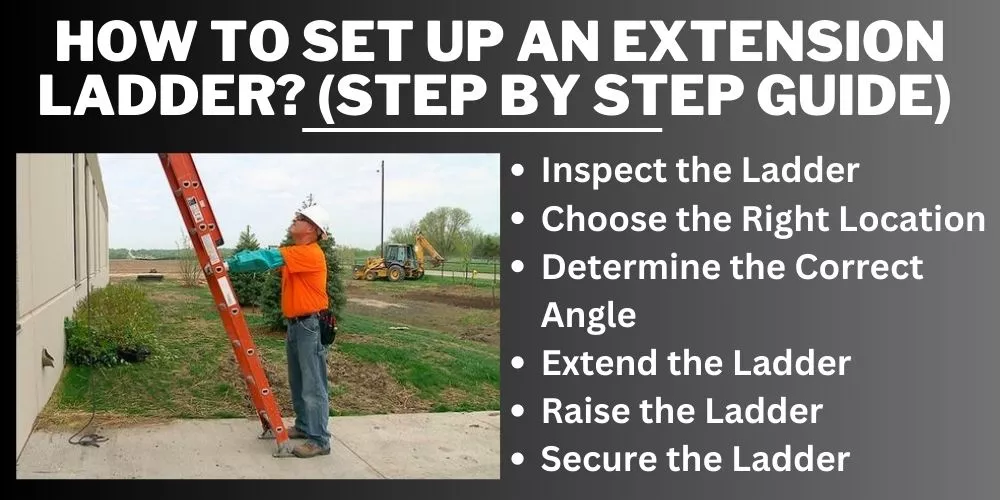
🪜 Step 1: Inspect the Ladder
Before you even begin setting it up, inspect your ladder for any defects or damages:
- Check for any loose or missing parts
- Make sure the ladder’s feet work properly
- Ensure the rungs and side rails are intact and free from cracks
- Validate that the pulley, ropes, and locks are functioning correctly
🪜 Step 2: Choose the Right Location
Choosing a solid and level base makes all the difference:
- Avoid setting up the ladder on unstable, wet, or slippery surfaces
- Keep away from doorways or areas with heavy foot traffic
- Ensure the area is free of obstacles like power lines or windows
🪜 Step 3: Determine the Correct Angle
Setting up your ladder at the correct angle is crucial for stability. To do this, you can employ the ‘4-to-1’ rule.
The Importance of the ‘4-to-1’ Rule
The ladder’s base should be one foot away from the wall for every four feet of height. This is called the ‘4-to-1’ rule, which helps ensure your ladder will stand at about a 75-degree angle—the safest and most effective position for climbing.
Here’s why it matters:
- Prevents the ladder from slipping out
- Reduces the likelihood of the ladder tipping backward
- Balances the force exerted onto the side rails
- Enhances stability while climbing
- Provides optimal user support
Measuring the Angle
You can use these techniques to help measure the correct angle:
- Visual method: Divide the ladder height by four and measure the distance on the ground from the base of the wall. For example, if the ladder reaches a 16-foot height, its base should be four feet from the wall (since 16 ÷ 4 = 4).
- Shadow method: On a sunny day, place the ladder against a wall and measure the length of the shadow it casts on the ground. This should match the distance from the ladder’s base to the wall.
- 90-degree right-angled triangle method: You can also create a 90-degree-angled triangle by attaching a short wooden strip (say 12 inches) perpendicularly to a long strip (48 inches). Place the long side along the ground, with the short side against the ladder’s base, to achieve the correct angle.
- Leveler app: Some smartphone apps, like levelers or inclinometers, measure angles and help calculate the right ladder positioning.
Extra Tips
- Check the angle after you’ve extended the ladder fully.
- If you’re setting up the ladder on uneven ground, adjust each foot independently to maintain a stable base, using levelers if necessary.
- Avoid overreaching by either extending the ladder or repositioning it; overreach can lead to accidents.
Ensuring the correct ladder angle significantly decreases the risk of accidents and increases stability while working at height.
🪜 Step 4: Extend the Ladder
Follow these steps to extend your ladder correctly:

- Keep the ladder flat on the ground, braces locked, and have one person hold it steady
- Pull on the rope to lift the fly section
- Raise it to the desired height and ensure that the rung locks are securely engaged
- Fully extend the ladder before erecting it
🪜 Step 5: Raise the Ladder
Raising the ladder can take some effort:
- Stand at the ladder’s base, hold onto the rungs, not the rails, and lift. You should lift the ladder over your head
- Walk hand over hand, under the ladder, until you’re standing upright
- If it’s too heavy, get a second person to help
How to raise the extension ladder by yourself?
Raising an extension ladder alone can be tricky, but with the right technique, it’s achievable.
Here’s a step-by-step guide,
- Check the area: Select a good location for your ladder and clear the area around its base of any obstruction. Ensure the location provides a stable footing for your ladder.
- Position the ladder: Carry the ladder to the building location with the fly section against your body. Stop about 6″ from the building and place the ladder flat on the ground.
- Raise the ladder: Move towards the end of the ladder, away from the house. Gradually walk it up, keeping a firm grip until it becomes vertical.
- Adjust the ladder: Once vertical, lift it away from the house to set the appropriate angle.
- Extend the ladder: Use the rope attached to the fly section to raise it to the desired height. Ensure the rung locks are securely engaged.
Remember, safety must always be a priority when dealing with extension ladders. If the ladder is too heavy or tall, don’t hesitate to ask for help or use professional equipment.
🪜 Step 6: Secure the Ladder
Securing your ladder correctly at the top and bottom greatly enhances safety. Here’s how you can ensure extra stability:

Securing the Top
Using ladder accessories, such as stabilizers or stand-offs, can help you secure the ladder top against the wall:
- Ladder stabilizer: This U-shaped accessory straddles the roof’s edge, providing a wider, more stable contact point against the wall. It keeps the ladder away from gutters or windows, protecting them from ladder damage.
- Stand-off/Standout brackets: These are fitted onto the ladder rungs and lean against the wall, creating a gap between the ladder and the wall. By dispersing the load evenly, they prevent the ladder from damaging the surface it leans against, such as windows or façades.
Remember to install these as per the manufacturer’s instructions.
Securing the Bottom
Having another person hold the ladder at the bottom until you’re done using it provides additional safety:
- This person can ensure the ladder doesn’t slip, shift, or topple over while you’re climbing.
- Ideally, the “spotter” should maintain a firm grip on the ladder and keep their feet firmly on the ground, standing clear of the area directly beneath it.
If a spotter isn’t available, there are other ways to anchor the ladder, such as ladder stoppers or spiked feet designed for outdoor use.
Securing Unattended Ladders
For unattended ladders, especially in wind-prone areas or on uneven surfaces, you may use sandbags or other weighty items:
- Place these around the base for added stability.
- Other items like ladder mitts (soft rubber or foam ends fitted onto the top ends of the ladder) or anti-slip mats can minimize ladder movement.
Being liberal with safety measures while using ladders can prevent many unwanted situations and accidents. Always secure your ladder before use, and never leave an extended ladder unattended.
🪜 Step 7: Climb Safely
Your safety while climbing the ladder is paramount:

- Always have at least one hand free to hold onto the ladder
- Avoid carrying heavy objects while climbing up or down
- Use tool belts or rope-and-pulley systems to lift your gear
Finally, always follow the manufacturer’s instructions and adhere to local regulations and standards. Safety should always come first.
What is the correct way to place an extension ladder?
When placing an extension ladder, ensure you have stable, flat ground to stand it on. Avoid wet or slippery surfaces, and keep the area clear of obstacles. Upright the ladder following the ‘4-to-1’ rule, which means for every four feet of ladder height, the base should stand one foot away from the wall or support surface.
Once the ladder’s base is secured, extend the ladder to the desired height, ensuring the rung locks are engaged before climbing.
Which side of an extension ladder goes against the house?
Most extension ladders have a fly section (the adjustable half) and a base section. When positioning an extension ladder against a house, the base section should be at the bottom with the rungs of the fly section facing towards you.
This orientation allows for the right grip on the rungs while climbing and prevents the ladder from flexing under load.
What is the safest angle for an extension ladder?
The safest angle for an extension ladder is 75 degrees. You can attain this by following the ‘4-to-1’ rule. This angle is essential because it provides optimal stability and reduces the chances of the ladder slipping outwards or tipping backward when pressure is applied.
Ensuring the ladder is straight and has solid grounding at this angle is crucial for safety.
How do you know if an extension ladder is at the correct angle?
You can confirm if your extension ladder is at the correct angle by using one of several different methods. Visually, the base should be a foot away from the wall for every four feet of ladder height.
So, if the ladder is 16 feet high, the base should be 4 feet from the wall. To assure accuracy, you can also use the shadow method or a 90-degree right-angled triangle. Some smartphone leveler or inclinometer apps can measure this angle too.
How to extend a ladder without a rope?
To extend a ladder without using a rope, you can manually push the fly section upward while maintaining a firm grip on the ladder. When doing this, follow these steps:
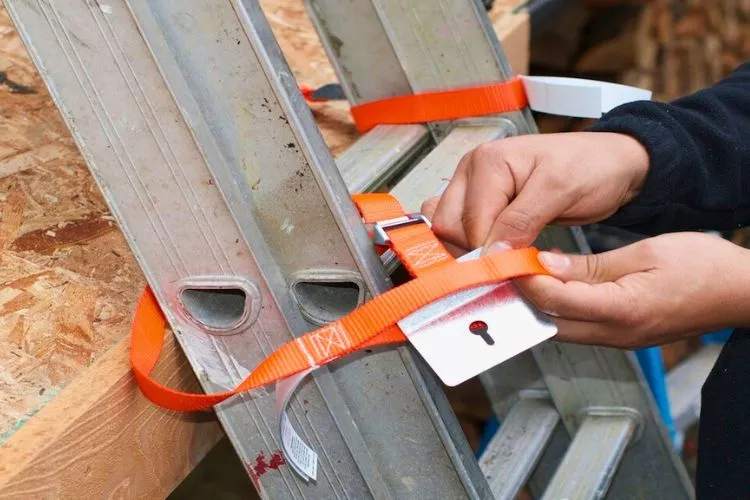
- Position the ladder safely: Ensure the ladder is on stable, level ground and follow the ‘4-to-1’ rule for the appropriate angle.
- Check the locks: Ensure the rung locks are disengaged before extending the ladder.
- Extend the fly section: Standing close to the ladder, grasp a rung of the fly section with both hands and firmly push it upward. Ensure to maintain control to prevent accidental slipping or dropping of the fly section.
- Lock the rungs: Once you have extended the ladder to the desired height, ensure the rung locks are properly engaged. As you lock the rungs, your hands will act as a brake to prevent the sudden dropping of the fly section.
- Double-check: Confirm that the rung locks are securely placed before climbing the ladder.
It’s crucial to exercise caution while extending a ladder without a rope. If the ladder is too large or heavy, ask for assistance or use professional equipment to avoid accidents and injuries.
Conclusion:
Understanding how to set up an extension ladder properly and safely is crucial for reducing the risk of accidents and ensuring stability during use.
By following the outlined steps—such as selecting a suitable location, verifying the ladder’s condition, adhering to the ‘4-to-1’ rule, and appropriately anchoring the top and bottom—users can make educated choices prioritizing safety.
Additionally, being cautious while raising, lowering, and adjusting extension ladders, especially when working alone or without proper equipment, can prevent mishaps.
By staying mindful of these guidelines and prioritizing safety, users can confidently depend on extension ladders to help them tackle tasks at height.


