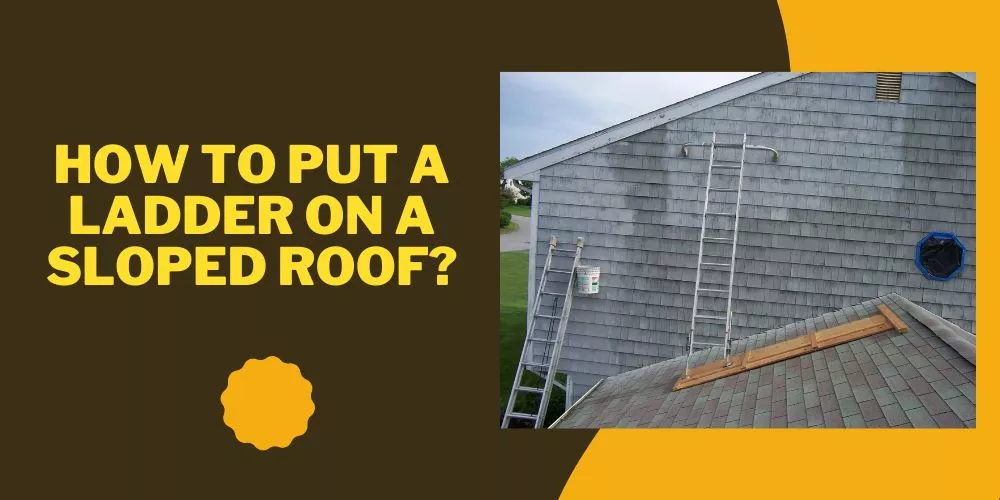
Roofing projects can be exciting and challenging, but safety should always be your top priority.
When working on roofs, a ladder hook is essential to provide stability, security, and peace of mind. It not only helps prevent accidents but also improves efficiency by allowing you to move around and easily access different areas of the roof.
In this article, I will explore the importance and benefits of using a ladder hook and provide step-by-step instructions on how to make a roof ladder hook yourself.
By the end of this guide, you’ll be well-equipped to create a reliable and cost-effective ladder hook that will make your roofing projects safer and more efficient.
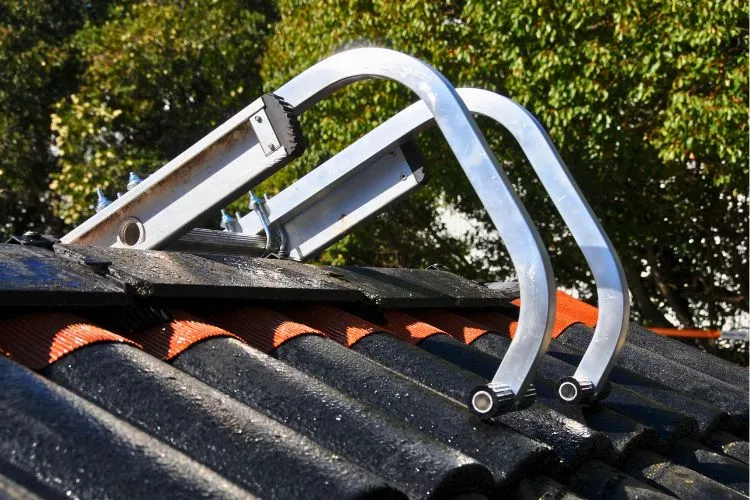
how to make a roof ladder hook: 6 Steps
A roof ladder hook is indispensable for ensuring safety and efficiency during any roofing project. In this comprehensive guide, I’ll walk you through of how to make a roof ladder hook in just 6 steps.
By following these instructions and referring to the visual aids provided, you can create a sturdy and reliable ladder hook that will make your roofing projects safer and more efficient.
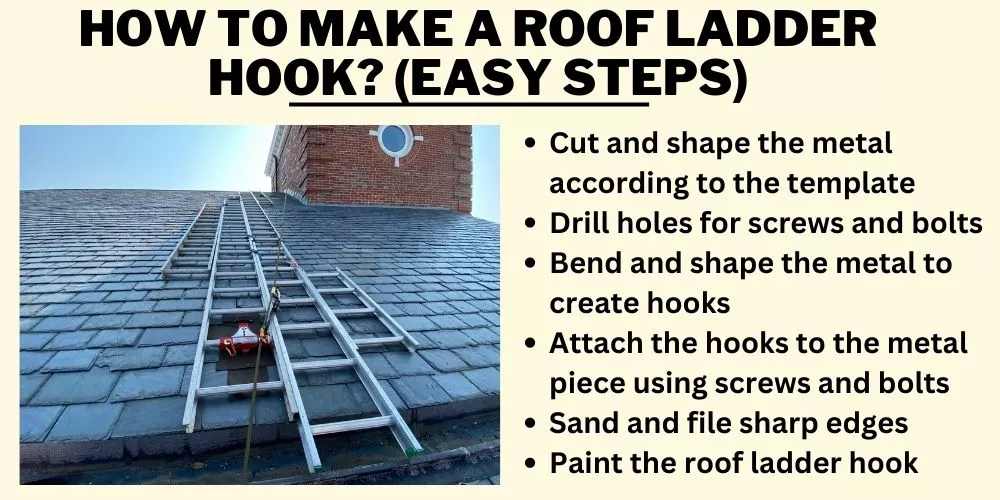
🪜Cut and shape the metal according to the template
Begin by selecting a strong and durable metal, such as steel or aluminum, for constructing your ladder hook. Measure the dimensions of your ladder and roof to determine the size of your ladder hook.
Create a template using these measurements as a guide, and trace it onto the metal sheet. Carefully cut the metal following the template using a metal cutting tool like a jigsaw or metal shears. This will form the base of your ladder hook, onto which the hooks will be attached.
🪜Drill holes for screws and bolts
Next, mark the spots where the hooks will be attached to the metal base. To guide your drill bit:
- Use a center punch to create a small indentation at each marked point.
- Carefully drill holes into the metal at these points, ensuring they are large enough to accommodate the screws and bolts used to secure the hooks.
- Wear safety goggles and gloves during this process to protect your eyes and hands from metal shavings.
🪜Bend and shape the metal to create hooks
Using a metal bender or vise, carefully bend and shape the metal to create hooks that securely grip the roof and ladder rungs. To ensure a consistent curve, you may use a round object like a pipe or a broom handle as a guide for bending the metal.
Ensure the hooks are curved enough to provide a firm hold but not so tight that they will be difficult to attach and remove from the ladder and roof.
🪜Attach the hooks to the metal piece using screws and bolts
Once the hooks are shaped, align them with the holes drilled in the metal base. Place a washer onto each screw or bolt before inserting it through the holes to help distribute the load and prevent the metal from being damaged.
Secure the hooks to the base using screws and bolts, ensuring they are tightened firmly to prevent movement or instability. You may use a thread-locking compound on the bolts to ensure they remain secure over time.
🪜Sand and file sharp edges
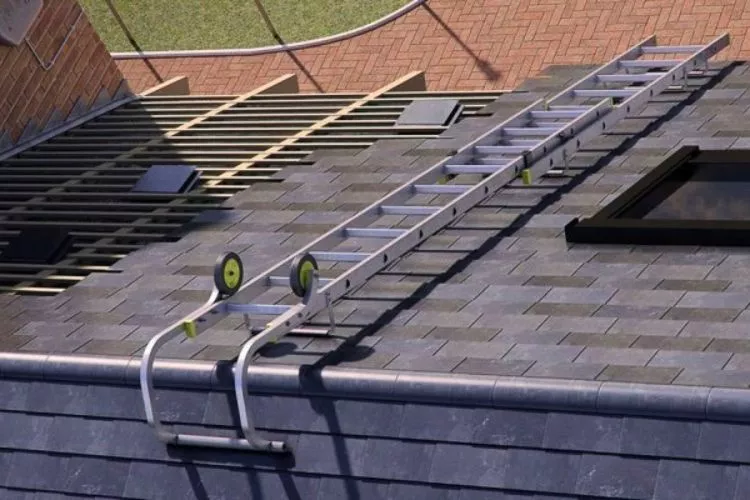
After attaching the hooks, inspect the entire ladder hook assembly for sharp edges or burrs. Use sandpaper or a metal file to smooth these areas, ensuring that the ladder hook is safe to handle and won’t cause any damage to your ladder or roof.
Pay particular attention to the edges of the hooks and the areas around the drilled holes, as these are common locations for sharp edges to form.
🪜Paint the roof ladder hook
Finally, clean the surface of the ladder hook with a damp cloth or a solvent to remove any dirt, grease, or metal shavings. Apply a coat of weather-resistant paint, such as a rust-inhibiting primer followed by a topcoat, to the ladder hook.
This will improve its appearance and protect the metal from rust and corrosion, ensuring a longer lifespan for your newly constructed ladder hook. Allow the paint to dry completely before using the ladder hook.
Remember to regularly inspect your ladder hook for any signs of wear or damage, and follow proper safety guidelines when using it. With your new roof ladder hook in hand, you’ll be well-prepared for any roofing project that comes your way.
How to make a wooden ladder hook?
To make a wooden ladder hook, you can follow this method:
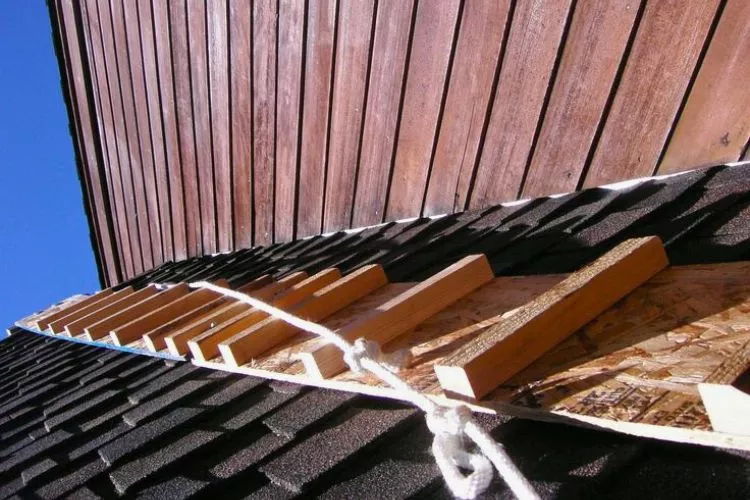
- Gather the necessary materials: You will need a standard 12-foot ladder, 4 short boards of plywood, 2 long plywood boards, wooden boards, a drill, two clamps, a protractor, screws, measuring tape, nails, a wood saw, and a pencil or marker.
- Measure and cut the wooden boards: Based on the dimensions of your ladder and roof, measure and cut the wooden boards to the appropriate size. These boards will form the base of your ladder hook.
- Mark and drill holes for screws and nails: Mark the spots on the wooden base where the hooks will be attached. Carefully drill holes into the wood at these points, ensuring they are large enough to accommodate the screws and nails used to secure the hooks.
- Cut and shape the hooks: Cut and shape the wooden hooks that will securely grip the roof and ladder rungs using a wood saw. Ensure the hooks are curved enough to provide a firm hold but not so tight that they will be difficult to attach and remove from the ladder and roof.
- Attach the hooks to the wooden base: Align the hooks with the holes drilled in the wooden base. Secure the hooks to the base using screws and nails, ensuring they are tightened firmly to prevent movement or instability.
- Sand and finish the wooden ladder hook: After attaching the hooks, inspect the assembly for rough edges or splinters. Use sandpaper to smooth these areas, ensuring that the ladder hook is safe to handle and won’t cause any damage to your ladder or roof. Finally, apply a coat of wood finish or paint to protect the wood and improve its appearance.
Always follow the manufacturer’s instructions for attaching and using roof ladder hooks, and ensure that you are using the appropriate safety equipment and precautions while working at heights.
How do you secure a ladder to a roof gutter?
You can use a ladder stabilizer or standoff to secure a ladder to a roof gutter. Attach the stabilizer to the top of the ladder, ensuring it spans across the gutter and rests on the roof instead of the gutter itself. This will prevent damage to the gutter and provide additional stability.
How do you secure a ladder on a slanted roof?
To secure a ladder on a slanted roof, follow these steps:

- Use a ladder with the appropriate length, ensuring it extends at least 3 feet above the roof edge.
- Place the ladder on a firm, level surface. If the ground is uneven, use ladder levelers or adjustable leg extensions to stabilize the ladder.
- Set the ladder at the proper angle. For every 4 feet of vertical height, the ladder base should be 1 foot away from the wall or roof edge.
- Use a roof ladder hook or ridge hook to secure the ladder to the peak or ridge of the roof. Attach the hook to the top two ladder rungs, and carefully roll the ladder up the roof until the hook reaches the peak. Flip the hook over the ridge so it grips the opposite side of the roof.
- Consider using a ladder stabilizer or standoff to provide additional stability and prevent damage to the roof or gutter.
- Always follow the manufacturer’s instructions for attaching and using ladder accessories, and ensure that you use the appropriate safety equipment and precautions while working at heights.
Safety Tips and Best Practices for Using Roof Ladder Hooks
When it comes to roofing projects, safety should always be your number one priority. Using roof ladder hooks is a great step towards ensuring stability and preventing accidents, but there are additional safety tips and best practices you should keep in mind:
Choose the Right Ladder
Selecting the appropriate ladder for your project is crucial. Ensure the ladder is tall enough to extend at least 3 feet above the roof edge and is made from durable materials like aluminum or fiberglass. Check the ladder’s weight capacity to make sure it can support both your weight and any additional equipment.
Inspect Your Equipment
Before beginning any roofing project, thoroughly inspect your ladder, ladder hook, and any other tools you plan to use. Look for signs of wear or damage, such as cracks, rust, or loose parts. Make any necessary repairs or replacements before proceeding.
Use Proper Footwear
Wearing the right footwear is essential for maintaining stability while working on a roof. Opt for shoes with non-slip soles and good ankle support to help prevent slips and falls. Avoid sandals, flip-flops, or any other footwear that does not provide adequate grip.
Secure the Ladder Properly
When setting up your ladder, make sure it is placed on a firm, level surface. If the ground is uneven, use ladder levelers or adjustable leg extensions to stabilize it. Position the ladder at a safe angle, with the base approximately 1 foot away from the wall or roof edge for every 4 feet of ladder height. Use a ladder stabilizer or standoff to prevent damage to gutters and provide extra stability.
Follow the Three-Point Rule
While climbing or descending the ladder, always maintain three points of contact – either two hands and one foot, or two feet and one hand. This helps ensure you remain stable and reduces the risk of losing your balance.
Avoid Overreaching
When working on a ladder, never overreach or lean too far to one side. Instead, move the ladder as needed to keep your body centered and maintain a safe working position. Overreaching can easily cause the ladder to tip over, leading to serious injury.
Use Additional Safety Equipment
Consider using additional safety equipment, such as a harness and safety line, especially if you are working on a steep or high roof. This extra layer of protection can help prevent falls and provide peace of mind while you work.
Stay Weather-Aware
Pay attention to weather conditions before starting your roofing project. Avoid working on roofs during strong winds, rain, or icy conditions, as these can significantly increase the risk of accidents. Choose a clear, calm day to ensure the safest working environment.
By following these safety tips and best practices, you can confidently use your newly constructed roof ladder hook and complete your roofing projects with greater peace of mind.
Conclusion:
Making a roof ladder hook is essential for homeowners and professionals alike, as it ensures safety and stability while working at heights.
Following the step-by-step guide outlined in this article, you can create a durable and reliable ladder hook that will securely grip both the ladder rungs and the roof.
Whether you create a metal or wooden ladder hook, taking the time to measure, cut, shape, and attach the hooks correctly is crucial to achieving a successful outcome.
Don’t forget to sand and finish your ladder hook to ensure longevity and protect it from the elements. By investing in a well-crafted roof ladder hook, you’ll be able to work on your roof confidently, knowing your ladder is securely anchored and safe to use.


