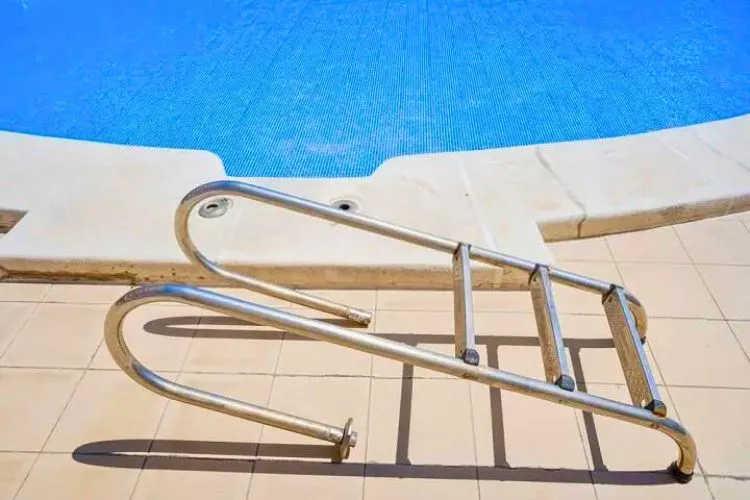
How to install a pool ladder in concrete? (A Step By Step Process)

🪜Gather Tools and Materials
🪜Preparing for the Installation
🪜Installing the Ladder
🪜Installing the Steps
Congratulations! You’ve successfully installed a pool ladder in concrete. Following this guide ensures that your swimming pool is safer and more accessible for all swimmers.
Remember to inspect the ladder for any signs of wear or damage and promptly address any issues to maintain its safety and longevity.
Do I need a mat under my pool ladder?
A mat under your pool ladder can provide several benefits, although it may not be strictly necessary in all cases. Here are some reasons you might consider using a mat:

- Protect the pool liner: If you have a vinyl or other soft pool liner, a mat can help protect it from potential damage caused by the ladder’s movement or pressure points. This is especially important for above-ground pools, where the ladder may be more likely to shift and cause wear on the liner.
- Improve stability: A mat can provide additional stability for the ladder, particularly if the pool floor is uneven or slippery. It can also help to distribute the ladder’s weight and users more evenly, reducing the risk of damage to the pool floor or ladder itself.
- Enhance comfort: A cushioned mat can make it more comfortable for swimmers to stand on while using the ladder, particularly if the pool floor is rough or abrasive.
If you decide to use a mat under your pool ladder, choose one specifically designed for this purpose, as it should be made from durable, water-resistant materials and have a non-slip surface.
Is the pool ladder supposed to touch the floor?
The pool ladder should touch the floor to ensure stability and safety. The ladder’s legs or rails should be in full contact with the pool floor, providing a stable base for swimmers to climb in and out of the pool.
If the ladder does not touch the floor or is uneven, it can become unstable, increasing the risk of accidents and injuries.
Where should ladder be placed in inground pool?
The placement of a ladder in an inground pool depends on several factors, including the pool’s shape, size, and depth, as well as other features such as steps or entry points.
Here are some general guidelines for ladder placement:
Place the ladder in an area that is easily accessible and visible to swimmers, ideally near the shallow end of the pool or close to the pool’s entry/exit point.

Avoid placing the ladder near pool features that could obstruct its use, such as diving boards, slides, or water features. If your pool has a deep end, consider installing a second ladder in that area to provide swimmers with an additional exit point.
Ensure the ladder is securely anchored to the pool deck and positioned so that it extends into the water at an appropriate angle, typically around 10-15 degrees from vertical.
How deep should the first step in a pool be?
The depth of the first step in a pool can vary depending on the pool’s design, local building codes, and user preferences. However, a general guideline is that the first step should be approximately 12 to 18 inches (30 to 45 cm) below the waterline.
This depth allows swimmers to easily enter and exit the pool without fully submerging themselves in the water.
Remember that the depth of the first step may also be influenced by factors such as the height of the pool deck, the presence of handrails or grab bars, and accessibility requirements for individuals with disabilities.
It’s essential to consult local building codes and safety regulations when determining the appropriate depth for your pool steps.
Maintenance Tips for Your Pool Ladder
Once your pool ladder is securely installed, maintaining it properly is essential for its longevity and safety. Regular inspection and cleaning can prevent wear and tear and ensure the ladder remains functional for years to come.
- Routine Inspections: Check the ladder and its mounting brackets for any signs of rust, corrosion, or damage. Pay special attention to the bolts and screws to ensure they remain tight and secure. Loose fasteners can compromise the ladder’s stability and should be promptly addressed.
- Cleaning and Care: Keep your ladder clean by rinsing it with fresh water, especially if you have a saltwater pool. Chlorine and salt can cause corrosion over time, so occasional cleaning with a mild detergent and a soft brush can help preserve the ladder’s finish. Avoid using harsh chemicals or abrasive tools, as these can damage the ladder’s surface.
- Seasonal Considerations: If you live in a region with harsh winters, consider removing the ladder during the off-season to protect it from freezing temperatures and ice damage. Store it in a dry, sheltered area to prevent rust and wear. Before reinstalling, inspect all parts to ensure they are in good condition.
- Enhancing Safety: For added safety, consider installing slip-resistant pads or grips on the ladder’s steps. This is particularly important for pools frequented by children or seniors, as it reduces the risk of slipping. Additionally, ensure the ladder is always free of debris like algae or leaves that could create a slippery surface.
By incorporating these maintenance practices, you can keep your pool ladder safe, attractive, and functional for years while protecting your investment and ensuring a safer swimming environment for all users.
Conclusion:
Installing a pool ladder in concrete can be a straightforward and manageable project when approached with the right tools, materials, and guidance.
By following the step-by-step instructions outlined in this article, you can securely anchor your pool ladder and ensure its stability and safety for swimmers of all ages and abilities.
Always prioritize safety by adhering to manufacturer guidelines, local building codes, and regular maintenance checks.


