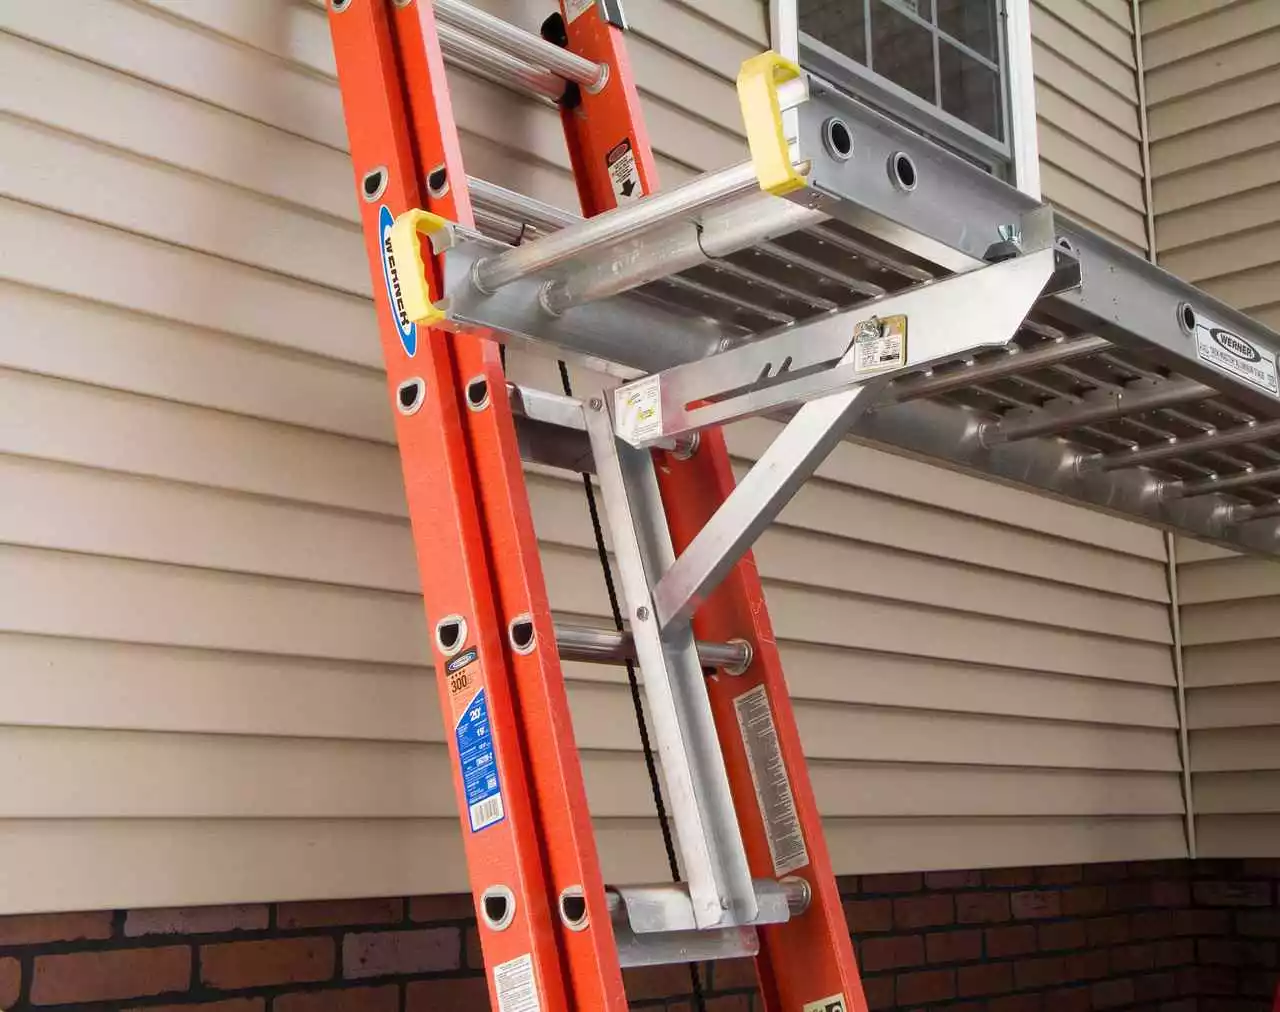
Ladder jacks are essential tools for extending the versatility of your ladders, empowering you to tackle a wide range of tasks with ease.
In this article, we will cover everything from setting up your ladder jacks to the best practices for ensuring your safety while using them.
So strap on your tool belt, and let’s get started on mastering the art of how to use ladder jacks in an easy to understand manner.

Quick Recommendations
No products found.
How to Use Ladder Jacks? (A Step-By-Step Process)
Ladder jacks are essential tools for construction jobs that require elevation. They provide an efficient and safety-focused platform system to navigate across two ladders.
This guide will take you through the process step-by-step, providing clear instructions to ensure you can learn how to use use ladder jacks safely and effectively.

🪜 What You Will Need?
- Two Extension Ladders
- One Pair of Ladder Jacks
- Plank
- Safety Gear (Helmet, Safety Harness and Gloves)
🪜 Steps to Use Ladder Jacks
- Inspect Your Materials: Ensure that the ladders, ladder jacks, and planks are fit for use and free from damage or defects.
- Set Up The Ladders: Set up your ladders in an ‘A-frame’ position where you will work. The ground should be firm and stable.
- Ensure each ladder has all feet securely on the ground.
- The ladder should be set up at an appropriate angle. A good rule of thumb is for every four feet of ladder height; the base should be one foot away from the structure.
- Attach the Ladder Jacks: Position your ladder jacks where you want your platform to be on the rung. Each ladder jack should come with two hooks. Secure them onto the ladders’ rungs, ensuring they are tightly affixed.
- Install the Plank: Put the plank in ladder jack brackets, ensuring it’s aligned and stable. Check if the plank can hold onto the hooks without sliding off and if it can support your weight. Ensure at least 6″ of the plank extends beyond each ladder jack.
- Safety Checks: Inspect the entire setup to ensure it’s safe and secure. Use your safety gear: Put on your helmet, fasten your safety harness, and wear gloves. Always keep at least one hand on the ladder while working.

🪜 Important Note
It’s always best to work with someone with experience with ladder jacks whenever possible, especially if you’re new to using them. Safety should always be your top priority.
Remember, never use ladder jacks in dangerous weather conditions, particularly during high winds, rain, or snow, as this may cause the ladders to become unstable.
Ladder jacks are a great tool to get you up where you need to be. With this step-by-step guide, you are on your way to safely and effectively using ladder jacks.
Homemade ladder jacks
Please note that these instructions are for informational purposes only, as commercial ladder jacks have been tested for safety and durability. Homemade ladder jacks may not meet safety standards and could lead to accidents if not properly constructed or used.

This guide assumes familiarity with woodworking, power tools, and safety precautions necessary when creating DIY construction equipment. Do not proceed if you are incapable or comfortable using such tools.
- Materials: You will need four 2x4s for your ladder jacks. Two of these will serve as the main supports, and the other two will be used to create braces. You will need screws, a hand saw, and a power drill.
- Measure and Cut: Based on the height you need, measure and cut your 2x4s. Two must be the same length, which will be your main support. Cut the remaining two into three pieces each: two long and one short. These will serve as braces.
- Assemble the Jacks: Each ladder jack has one main support and three braces. Arrange the braces in a triangle on one end of the main support and secure them with screws.
- Test for Fit: Once your jacks are assembled, test them on your ladder to ensure they fit and can support the weight. Make any necessary adjustments.
Again, please note that homemade ladder jacks should be cautiously used. They have not been tested for safety and could lead to accidents or injury.
Frequently Asked Questions (FAQs)
Can you use ladder jacks on either side of the ladder?
Yes, ladder jacks are designed to be used on either side of a ladder. Most ladder jacks are designed to attach to the ladder’s rungs and are flexible so that they can be installed on either side of the ladder.
However, while you can attach ladder jacks to either side of the ladder, it is not advised to attach them to both sides of the same ladder and attempt to use two platforms at the same height. Doing so may cause instability and can lead to a dangerous work situation.
What is the maximum height for a ladder jack scaffold?
According to OSHA (Occupational Safety and Health Administration), the maximum height for a ladder jack scaffold is 20 feet. This standard (29 CFR 1926.452(k)(2)) mandates that ladder jacks can’t be used to a height exceeding 20 feet. Any use above this can increase the risk of serious injury due to falls or unstable working conditions.
Safety is always the first priority when working with ladders and ladder jacks. Always make sure to review and observe all safety standards.
Conclusion:
Our guide aimed to provide an in-depth walkthrough of each necessary step, from setup to safety checks.
Remember, maintaining safety throughout the task is of utmost importance and should never be compromised on any grounds, which includes inspecting your equipment, properly placing your ladders, securely attaching ladder jacks, and adhering to all safety guidelines.
Commercial, professionally crafted ladder jacks remain the top choice due to their compliance with safety norms and durability standards. Yet, homemade ladder jacks also exist if you feel comfortable with your craftsmanship abilities.
We hope this guide gave you the insights to safely and correctly use ladder jacks. Here’s to safer heights and efficient work!


