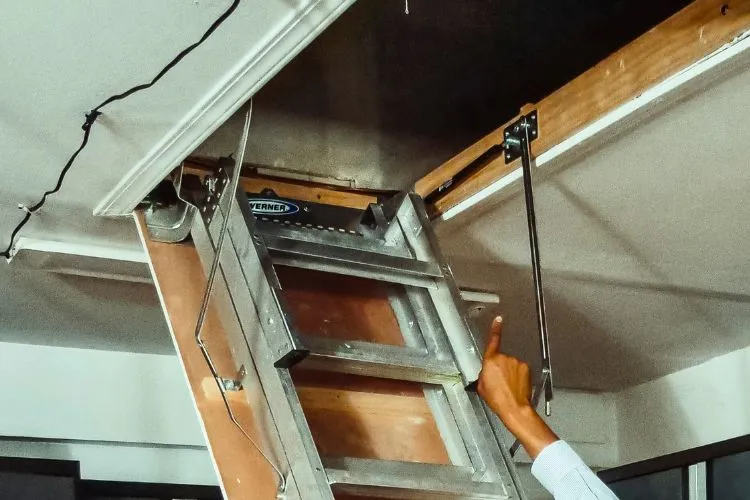
Is your attic ladder showing signs of wear and unsteadiness? A faulty attic ladder spring could be the culprit. This essential component keeps your ladder in place, ensuring your safety while you ascend or descend.
This article delves into the practical step-by-step process you can undertake to learn how to fix attic ladder spring.
Gear up for an informative read that will grant you the skills to restore steadiness to your ladder, sparing you from potential injuries and costly professional repairs. Let’s safely climb our way to a flawless attic ladder spring together!

how to fix attic ladder spring?
Fixing an attic ladder spring can seem difficult, but with the right information and tools, you can confidently perform this task.
This guide allows you to do just that, saving you professional repair fees and ensuring continued safety in your home.

🪜 Understanding the Basics
Before we dive into the repair process, it’s critical to understand what an attic ladder spring does. Positioned at the sides of the ladder, these springs support the ladder’s weight, making the folding and unfolding process swift and effortless.
When it’s faulty, the ladder can become unstable and unsafe for use.
🪜 Assessing the Damage
Your first step involves assessing the extent of damage to the springs. Check for apparent signs of wear, breakage, or misalignment. Sometimes, all it takes is resetting the spring to its original location.
At other times, it may require replacement. This step is vital to determine the next course of action.
🪜 Gathering Your Repair Tools
For a successful repair process, you will need:
- New springs (if replacement is needed)
- Wrench
- Pliers
- Screwdriver
- Ladder (to reach the attic spring if it’s too high)
Ensure your tools are in good shape and ready for use; a well-equipped toolkit can make a significant difference in your repair process.
🪜 replacing the attic ladder springs

- Identifying the Broken Spring: If your attic ladder’s spring is broken, your first step should be to positively identify the affected spring. This could be a simple eyeball test or feeling for loose parts within the spring mechanism. Don’t forget to wear protective goggles to shield your eyes from unexpected debris.
- Removing the Old Spring: Once you have identified the broken spring, use the screwdriver to remove the bolts that hold the spring to the ladder. Hold on the ladder railings or, if necessary, use another ladder to ensure you’re secure and safe as you do this. Be careful not to lose the bolts as they will be necessary for securing the new spring to the ladder.
- Installing the New Spring: With the old spring out, it is time to fit in the new spring. You may want to wear protective gloves since the springs can be sharp and cause injuries. Align the holes on the spring ends with those on the ladder, carefully positioning the spring. Once in position, re-insert the bolts and ensure they are tightly screwed to secure the spring to the ladder.
🪜 Adjusting the Spring
- Identifying the Misaligned Spring: Sometimes, an unstable ladder does not necessarily mean the spring is broken; instead, it may be misaligned. Ascertain if this is the case by carefully examining the springs.
- Loosening the Bolts: Once the misaligned spring is identified, use your wrench to loosen the bolts to free up some movement. Do not fully remove the bolts; just enough loosening will allow for adjustments.
- Adjusting and Retightening: Next, gently realign the spring to its correct position. To ensure correct alignment, the spring should ideally sit flush against the ladder sides without any buckling or twisting. Once you’re satisfied with the position, re-tighten the bolts. This secures the spring in place and prevents further misalignment.
Remember to always conduct a subsequent test following your repairs to confirm stability and correct operation of the ladder.
🪜 Testing the Ladder
After the repair or replacement, it’s vital to test the ladder for safety. Carefully climb the ladder and note any instability. If the ladder feels unsafe still, it’s advisable to consult a professional to avoid accidents.
🪜 Safety Tips
Remember that safety is paramount. Always let someone know when you’re working on the ladder, never rush your adjustments, and make sure to keep your work area clutter-free to prevent accidents. Always prioritize your safety over finishing the task quickly.
Why is My Attic Door Not Closing All the Way?
There can be multiple reasons for an attic door not closing properly. Here’s a look at some common causes:

- Misaligned Hinges or Frame: Sometimes, the door’s hinges may become misaligned due to regular use or improper installation. This can prevent the door from properly closing. Similarly, if the frame of the door is not square or if it has warped over time, it can cause issues with the door closing.
- Inadequate Clearance: If there’s not enough clearance between the door and its frame, it may have difficulty closing. Remove any obstructions in the door swing path also analyze if the door expands due to fluctuation in seasonal temperatures.
- Faulty Ladder Mechanism: If your attic door has an integrated ladder, the ladder system might be preventing the door from closing. It could be due to a misaligned ladder, a worn-out spring, or issues with the folding mechanism.
- Insulation Problems: Poorly fitted or expanded insulation can also prevent the attic door from closing correctly. The excess or misaligned insulation can physically block the door.
Do Attic Ladders Need to Touch the Ground?
Yes, attic ladders should ideally touch the ground. This ensures stability when you’re climbing up or down. If there’s a gap between the bottom of the ladder and the floor, it might wobble or move, creating a safety risk.
However, the ladder should not press hard into the floor. It should just touch the ground enough to provide a stable base. If the ladder is too long and heavily presses into the floor, you may need to trim the ladder legs to fit accurately.
Remember, the attic ladder should be positioned at a descending angle of around 60-75 degrees for optimal safety and performance. It ensures a comfortable ascent and descent, distributes weight appropriately, and minimizes the risk of falls.
Conclusion:
Empowered with hands-on knowledge and actionable steps, you’re now ready to tackle attic ladder spring repairs confidently. Remember, consistent maintenance and checks will extend your ladder’s durability and ensure your safety.
Should replacement be the necessary course of action, investing in high-quality springs pays off in long-term stability and assurance.


