Embrace your inner artist and dive into the world of creativity with a DIY project that repurposes a step ladder into a versatile and functional easel.
By giving new life to an old ladder, you not only create an invaluable tool for your artistic pursuits but also contribute to reducing waste and promoting sustainability.
In this step-by-step guide, we will walk you through the process of how to make an easel from a step ladder, providing insights, expert tips, and safety considerations along the way.

How to Make an Easel from A Step Ladder?
Materials Needed: Gather all the supplies required for this project before diving into the construction phase. Here’s a comprehensive list of materials and tools you will need:
- Step ladder: Choose a ladder with a sturdy and stable design.
- Measuring tape: Essential for taking accurate measurements.
- Plywood or Masonite board: Acts as a support surface for your canvas or artboard.
- Screws and screwdriver: Needed for attaching various components securely.
- Hinges: Used to create a movable back support for adjusting the angle of the easel.
- Clamps or brackets: Keep the canvas or artboard in place while working.
- Drill: Required for making holes and attaching components.
- Sandpaper: Ensures a smooth finish by removing rough edges or splinters.
- Paint or stain (optional): Customize the appearance of your easel.
Steps to Make an Easel from a Step Ladder

Step 1: Preparation
Before starting the project, set aside a dedicated workspace. Clean the step ladder thoroughly to remove dust, dirt, or any debris that may hinder the construction process.
Gather all the necessary tools and materials, ensuring everything is within reach.
Step 2: Choosing the Right Ladder
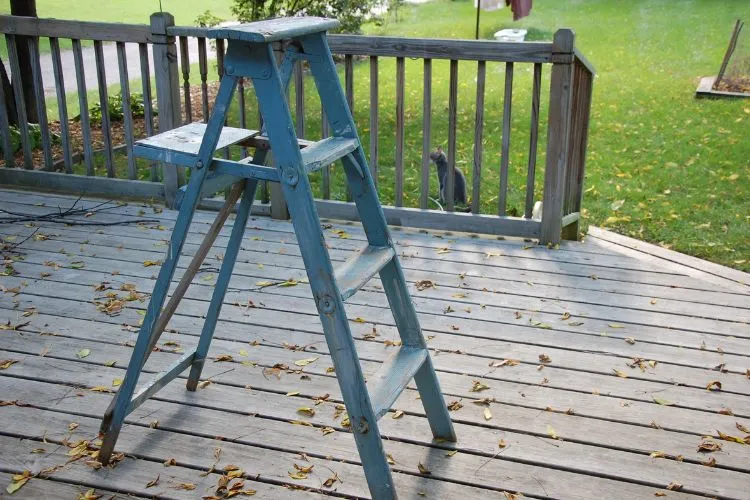
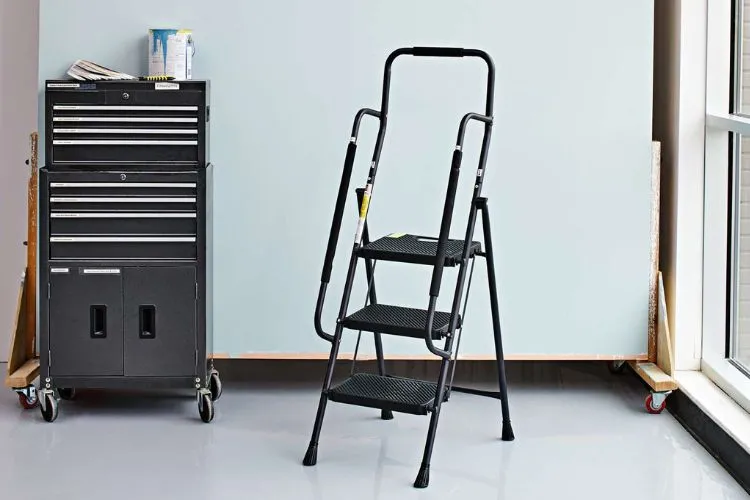
Not all step ladders are suitable for conversion into an easel. Look for a ladder that has a wide and stable base, able to withstand the weight of your canvas or artboard.
Avoid ladders with any structural damage or weak joints as these could compromise the overall stability of your easel.
Step 3: Adjustments and Modifications
Begin by adjusting the height of the step ladder to your preferred working level. Consider the highest and lowest points you usually paint or draw on, ensuring the ladder can accommodate those dimensions.
If needed, reinforce the ladder’s joints by using appropriate hardware and techniques, ensuring it remains stable when in use.
Step 4: Adding Support and Holders
To support your canvas or artboard, attach a sturdy piece of plywood or Masonite board to the front of the ladder. Secure it with screws, ensuring it is level and centered.
Additionally, consider adding clamps or brackets to hold the canvas or artboard in place while you work, preventing any accidental movement that may disrupt your creative process.
Step 5: Finishing Touches and Personalization
With the main structure of your easel complete, you can unleash your creative flair by adding finishing touches and personalizing its appearance.
Sand down any rough edges or splinters to ensure a smooth finish. If desired, apply a coat of paint or stain to match your artistic style or complement your workspace.
Step 6: Final Inspections and Safety Considerations
Before you embark on your artistic journey, conduct a thorough final inspection of your converted easel. Ensure all screws are tight, and there are no loose or unstable parts.
Check the stability of the ladder and make any necessary adjustments. Always prioritize safety when using your easel, ensuring it remains stable and secure while you create your masterpiece.
You may also find useful: Can Step Ladders Be Recycled?
Pro Tips and Key Notes

- Consider adding wheels or casters to your easel to make it easily movable within your workspace.
- If you prefer an adjustable angle for your easel, attach hinges at the back, allowing you to modify the tilt as needed.
- Attach a small tray or shelf to your easel for holding brushes, paints, or other art supplies.
- Experiment with different materials for the support surface, such as corkboard or magnetic whiteboard, to optimize your creative process.
Repurposing and Upcycling
In recent years, there has been a growing interest in repurposing and upcycling as a means of reducing waste, conserving resources, and promoting sustainability. Repurposing involves taking something that is no longer used for its original purpose and transforming it into something new and functional.

Upcycling, on the other hand, involves using creative techniques to upgrade or enhance the value of an item while still maintaining its original purpose. Both practices offer a range of benefits, including environmental impact reduction, cost-effectiveness, and the opportunity to showcase artistic creativity.
When it comes to repurposing a step ladder, the possibilities are endless. Here are some creative ideas for repurposing step ladders or similar items:
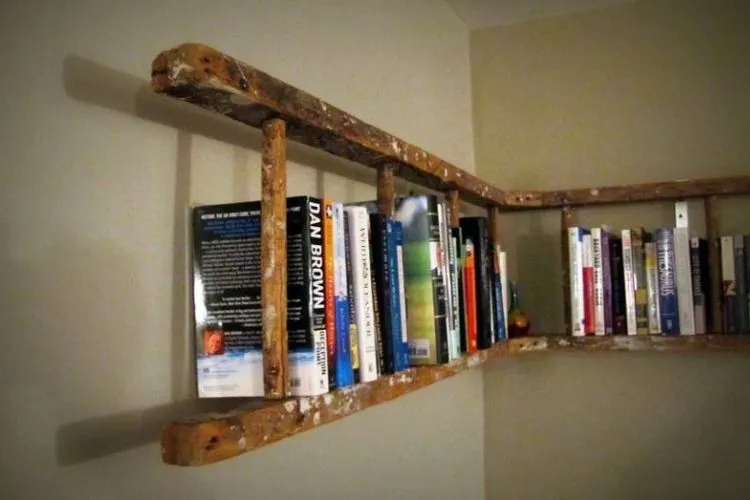
- Bookshelf or Display Stand: By removing the steps and securing shelves in their place, a step ladder can be converted into a unique bookshelf or display stand. The rungs of the ladder provide a perfect space for showcasing books, decorations, or even potted plants.
- Clothes Drying Rack: Attach wooden dowels or clotheslines across the rungs of a step ladder to create a stylish and functional clothes drying rack. This repurposed ladder can add a touch of rustic charm to your laundry room or outdoor space.
- Plant Stand: Give your indoor or outdoor plants a stylish home by repurposing a step ladder as a plant stand. Simply secure pots or containers at different heights along the ladder’s rungs, creating an eye-catching vertical display for your greenery.
- Towel Rack: Transform a step ladder into a decorative towel rack for your bathroom by adding hooks or rungs to hold towels. This repurposed ladder not only adds storage functionality but also becomes a unique piece of decor that adds character to your space.
- Kitchen Organizer: Repurpose a step ladder to create extra storage in your kitchen. Add hooks, baskets, or shelves to hang cooking utensils, store spices, and display cookbooks. This DIY kitchen organizer helps free up counter space while adding a touch of charm to your culinary haven.
- Artistic Canvas Display: Turn your step ladder into an art display by attaching picture frames, canvas holders, or even clipboards along the rungs. This repurposed ladder creates an artistic and versatile gallery to showcase your favorite artwork or family photos.
- Outdoor Planter Shelf: Take your gardening to new heights by converting a step ladder into an outdoor planter shelf. Utilize the rungs to hold pots of various sizes, allowing you to create a multi-tiered display of colorful flowers or fresh herbs in your backyard or balcony.
- Magazine or Mail Organizer: Repurpose a step ladder into a stylish magazine or mail organizer by adding pocket shelves or dividers along the rungs. This functional DIY creation helps keep your reading materials organized and prevents clutter.
When repurposing and upcycling, there are a few key factors to keep in mind:
- Safety: Ensure that any modifications or additions to the ladder are securely attached and do not compromise its stability.
- Aesthetics: Consider the overall look and feel you want to achieve with your repurposed ladder. You can choose to paint, stain, or distress the ladder to match your existing decor or create a unique statement piece.
- Functionality: Tailor the repurposing project to suit your needs and desired functionality. Consider the specific purpose you have in mind for the ladder and make modifications accordingly.
By repurposing a step ladder or similar items, you not only breathe new life into something old or unused but also contribute to reducing waste and promoting sustainability. Get creative, think outside the box, and explore the endless possibilities of repurposing and upcycling.
Give a step ladder a second chance, transforming it into a functional and aesthetically pleasing object that adds character to your space while minimizing your environmental impact.
Frequently Asked Questions (FAQs)
Which type and size of step ladder work best for this project?
When selecting a step ladder, choose one with a wide base and sturdy construction. The size should depend on the maximum dimensions you plan to work with.
How much time does it take to make an easel from a step ladder?
The time required for this project may vary depending on your skill level and the intricacy of modifications. On average, it should take a couple of hours to complete.
Can this easel be adjusted for different canvas sizes?
Yes, by incorporating a movable back support or adjustable brackets, the easel can be modified to accommodate various canvas or artboard sizes.
Is it possible to dismantle the easel for easy storage and transportation?
Yes, if portability is a concern, use detachable components or hinges to allow for easy disassembly and reassembly when needed.
Are there any safety concerns while using a converted ladder easel?
Always prioritize your safety. Ensure the ladder is stable and secure, and avoid overloading the easel beyond its intended capacity.
Conclusion:
With a bit of creativity and resourcefulness, you can transform a humble step ladder into a functional and versatile easel. Not only will this DIY project breathe new life into an old ladder, but it will also provide you with the ideal artistic platform to explore your creativity.
From the initial preparation to the final safety checks, follow the steps outlined above to create a durable and personalized easel that will enhance your artistic journey. Embrace the pleasure of repurposing materials and enjoy the limitless possibilities an easel made from a step ladder brings to your artistic endeavors.


